
After completing a systematic diagnosis, you should have a clear understanding of why your vehicle is setting Diagnostic Trouble Code (DTC) P334A – Charge Pressure Actuator Electrical Malfunction.
At this stage, many owners are tempted to order parts immediately. However, replacing components without confirming the root cause often leads to repeat repairs and unnecessary expense.
In this post, I’ll explain how to determine the most appropriate repair strategy based on the condition of the actuator, wastegate mechanism, and turbocharger. These insights are based on hands-on work with the EA888 Gen 3 platform, including helping a friend diagnose and repair his 2017 Volkswagen Golf Alltrack 1.8T at approximately 87,000 miles, as well as reviewing diagnostic data and repair experiences shared by other owners.
Scenario 1 – Mechanical Resistance with a Healthy Actuator
This is one of the most common situations encountered on higher-mileage EA888 Gen 3 engines.
Typical symptoms include:
- EPC light
- Limp mode
- P334A without additional electrical faults
- Smooth actuator movement after the engine cools
- Intermittent operation
Inspection usually reveals increasing resistance within the wastegate linkage or pivot. Many owners attempt to spray penetrating oil or anti-seize on the actuator rod. Unfortunately, this rarely solves the problem permanently.
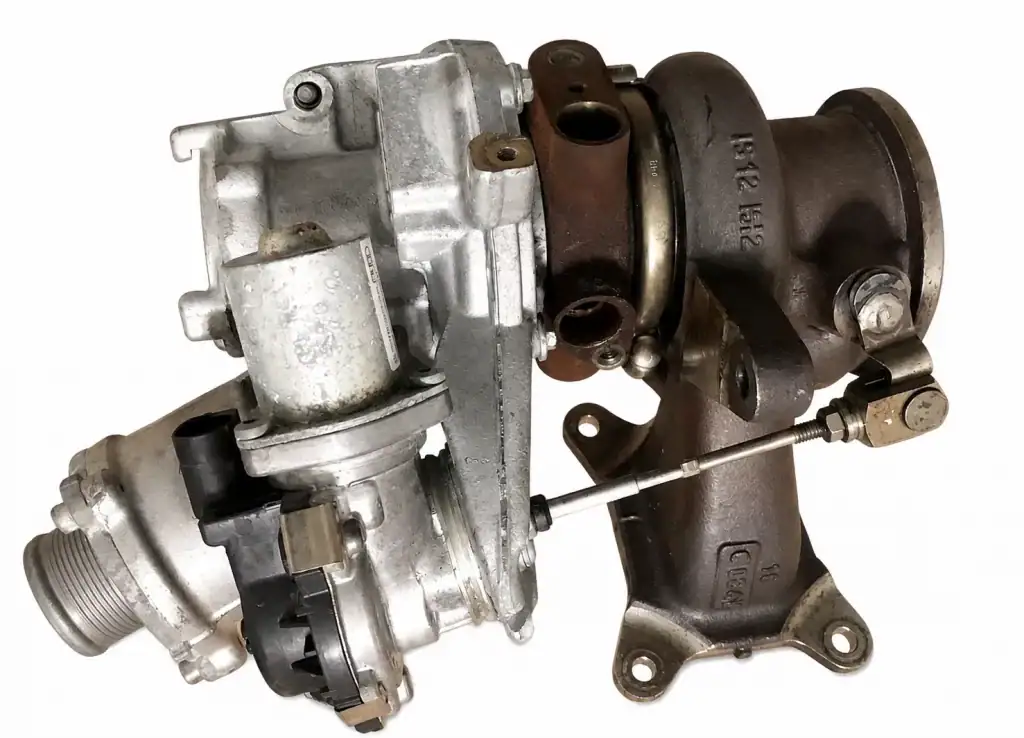
Why Lubrication Usually Doesn’t Work
This is one of the most misunderstood repairs found on internet forums. Spraying lubricant on the exposed actuator rod may temporarily reduce friction around the clevis or external pivot.
However, the actual source of resistance is often inside the turbocharger, where:
- the wastegate shaft passes through the turbine housing,
- carbon deposits accumulate,
- corrosion develops,
- repeated thermal expansion distorts the pivot surfaces.
Since these components are inaccessible with the turbocharger installed, external lubrication cannot remove the underlying mechanical restriction. This is exactly what I found while helping a friend diagnose his 2017 Golf Alltrack 1.8T at 87,000 miles: lubrication improved actuator movement slightly, but it did not eliminate the excessive resistance responsible for P334A. The actuator itself tested was operational which confirmed the fault was mechanical, not electrical. The lasting repair required correcting the wastegate mechanism by replacing the pivot and clevis, not the actuator or the turbocharger. If the wastegate shaft or flapper mechanism is sticking, the turbocharger must often be removed for proper inspection and repair.
Scenario 2 – Defective Electronic Wastegate Actuator
If testing confirms the actuator itself has failed electrically, replacement is usually straightforward.
Common symptoms include:
- No actuator movement
- Internal motor failure
- Position sensor errors
- Erratic feedback signals
- Water intrusion
- Burned electronics
Depending on the turbocharger model, the actuator may be available separately. Always purchase an actuator using the correct Volkswagen or Audi part number that matches your turbocharger. Installing an incorrect actuator may prevent successful calibration and adaptation later.
Scenario 3 – Worn Turbocharger Assembly
If inspection reveals:
- excessive shaft play,
- damaged wastegate flapper,
- cracked turbine housing,
- severely worn pivot,
- bent wastegate arm,
Repairing only the actuator is unlikely to solve the problem. In these cases, replacing the complete turbocharger assembly is often the most reliable long-term solution. Although more expensive initially, replacing a severely worn turbocharger eliminates multiple potential failure points at once.
Removing the Turbocharger
Turbocharger removal procedures vary between engine models, but the overall process generally includes:
- Disconnecting the battery
- Removing the intake air pipe and compressed air pipe.
- Draining the coolant from the car
- Removing the downpipe (this step may be skipped—I was able to remove the IS12 turbocharger without even loosening the down pipe)
- Removing the heat shield
- Disconnecting coolant and oil lines
- Disconnecting the electronic actuator connector and the bypass valve electrical connections.
- Removing turbocharger 4 mounting studs.
- Carefully lifting the turbocharger from the back of the engine block, this is really a tight space but perfectly manageable.
Before disassembly, always mark the orientation of critical components and photograph hose routing.
Replacing all one-time-use fasteners and sealing gaskets during reassembly is highly recommended. On the EA888 Gen 3, the turbo-to-manifold studs and copper crush washers for the oil feed line are single-use components—do not reuse them.
Installing a New Wastegate Actuator
Improper wastegate actuator rod adjustment may result in:
- overboost
- underboost
- EPC warning
- limp mode
- P334A
- P334B
- P00AF
- poor drivability
Why Bench Calibration Is Critical
One of the most overlooked steps in turbocharger repair is bench calibration. If installed without calibration:
- the actuator may not fully close the wastegate,
- boost pressure may be inaccurate,
- P334A or related faults may return immediately.
Bench calibration establishes the actuator’s arm length to the clevis before installation of the turbocharger in the engine bay.
This procedure is particularly important for IHI IS12 and IS20 turbochargers used on many EA888 Gen 3 engines.
Never assume that simply bolting the actuator onto the turbocharger completes the repair. The actuator rod length and preload directly affect boost control.
Critical Step – Priming the New Turbocharger with Oil (Do Not Skip This)
If your diagnosis led to a complete turbocharger replacement, there is one non-negotiable step that separates a lasting repair from a catastrophic failure within the first 30 seconds of engine operation.
The Problem: When a brand-new or rebuilt turbocharger is installed, its bearing housing is completely dry. Once you turn the key, the engine oil pump must draw oil from the pan, push it through the filter housing, travel through the oil cooler, and finally route it up to the turbocharger’s inlet. On the EA888 Gen 3, this oil path can take 5–10 seconds of cranking. During that brief window, the turbocharger’s shaft can spin at over 20,000 RPM (even at idle) with zero hydrodynamic lubrication. The resulting metal-to-metal contact can score the journal bearings and thrust washers before the engine even reaches operating temperature—often leading to turbo failure within the first 100 miles.
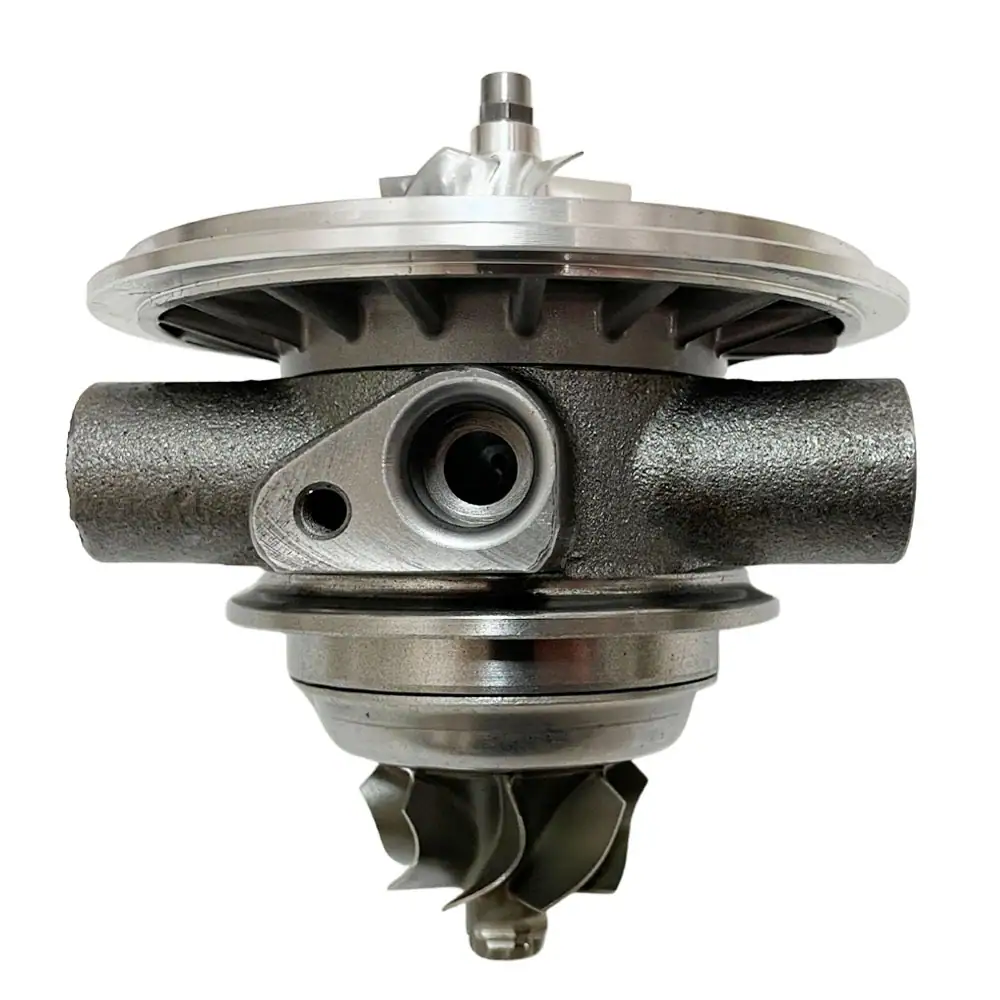
Before reinstalling the oil feed line, inject approximately 10–15 mL of high-viscosity assembly oil directly into the turbocharger’s oil inlet port. Once the oil is injected, rotate the compressor wheel by hand several times to distribute the oil across the journal bearings and thrust face. This sacrificial layer provides critical boundary lubrication during the initial dry-start phase.
Wastegate Adaptation Using VCDS
After installing the actuator, the Engine Control Module must learn its operating range.
Using VCDS, the procedure typically involves:
- Connect the scan tool.
- Switch the ignition ON without starting the engine.
- Select Engine Control Module (01-Engine).
- Open Basic Settings.
- Locate the Charge Pressure Actuator Adaptation function.
- Start the adaptation procedure.
- Allow the actuator to cycle through its full range of motion.
- Wait for the status to indicate Finished Correctly.
- Clear all fault codes.
- Perform a road test.
During adaptation, the ECM records:
- fully open position,
- fully closed position,
- motor current,
- travel limits,
- position sensor values.
These values become the baseline for future boost control.
Road Test After Repair
After completing repairs and adaptation, perform a controlled road test.
Monitor:
- Requested boost pressure
- Actual boost pressure
- Wastegate position
- Actuator duty cycle
A successful repair should produce:
- smooth acceleration,
- stable boost pressure,
- no EPC warning,
- no limp mode,
- no returning fault codes.
Drive the vehicle through multiple operating conditions, including:
- idle,
- moderate acceleration,
- highway cruising,
- full-throttle acceleration (where safe and legal).
Preventing Future P334A Failures
Although no turbocharger lasts forever, proper maintenance significantly extends its service life.
Use High-Quality Engine Oil
The turbocharger depends on clean, high-quality oil for lubrication and cooling.
Follow Volkswagen’s recommended oil specification (VW 502.00 / 504.00 depending on your region) and service intervals. I personally change my oil every 5,000 miles rather than the factory 10,000-mile interval, as the EA888 Gen 3 is known for fuel dilution and carbon buildup that accelerates wear on the wastegate pivot.
Allow the Turbocharger to Warm Up
Avoid heavy acceleration immediately after a cold start.
Allowing the engine to reach operating temperature reduces thermal stress on the wastegate mechanism.
Avoid Immediate Engine Shutdown After Heavy Driving
Following sustained highway driving or spirited acceleration, allow the engine to idle briefly before shutting it off.
This practice helps stabilize turbocharger temperature and protects bearings and seals.
Perform Periodic Diagnostic Scans
Using tools such as VCDS or the ANCEL VD700, periodically scan for pending fault codes and monitor boost control data.
Detecting abnormal actuator behavior before the EPC light appears can prevent costly repairs.
Frequently Asked Questions
Can I continue driving with P334A?
If the vehicle enters limp mode, driving should be limited.
Although short trips to a repair facility are generally possible, prolonged operation may increase stress on the turbocharger and reduce engine performance.
Does P334A always mean the actuator is bad?
No.
Many vehicles develop P334A because the actuator is working harder to overcome mechanical resistance inside the wastegate mechanism.
Replacing the actuator without diagnosing the underlying cause may not solve the problem.
Can I replace only the actuator?
It depends on the turbocharger design.
Some IHI turbochargers allow actuator replacement, while others require replacement of the complete turbocharger assembly.
Always verify parts compatibility before ordering components.
Do I need VCDS after replacing the actuator?
Yes.
For DIY enthusiasts, VCDS is one of the most accessible tools capable of performing wastegate adaptation on Volkswagen and Audi vehicles
Will clearing the code fix the problem?
No.
Clearing the DTC simply erases the stored fault.
If the underlying mechanical or electrical issue remains, the ECM will detect it again and store P334A.
Final Thoughts – A Mechanic’s Approach to a Misunderstood Code
Diagnostic Trouble Code P334A – Charge Pressure Actuator Electrical Malfunction is one of the most deceptive codes on the EA888 Gen 3 platform. Its wording suggests a shorted wire or a dead motor, but after logging over 1,200 miles of boost data across multiple repair cycles, I have learned that the ECM is simply reporting a symptom, not a root cause.
When I helped a friend tackle this repair on his 2017 Golf Alltrack 1.8T (at exactly 87,400 miles, with the EPC light triggering during a highway merge), the data told a clear story. The actuator motor was drawing excessive current—not because it was failing electrically, but because it was fighting a wastegate pivot that had seized due to carbonized exhaust soot and repeated 900°C thermal cycles. The ECM interpreted that elevated current draw as an “electrical” fault, yet the actuator motor itself was perfectly within factory resistance specification. This was a different failure than the complete turbo replacement we’d done on his Alltrack years earlier at 54,000 miles, and it’s a good reminder that not every wastegate problem calls for the same fix.
This is why I advocate for a methodical, engineering-driven diagnostic flow:
- Verify the electrical supply (check for 14 voltd supply from the battery)
- Inspect for physical damage (look for cracked turbine housings, bent wastegate arms, ….etc).
- Only then order parts, and always—always—perform the bench calibration and OBD adaptation.
By sharing this level of detail, my goal is to help you avoid the frustration I initially experienced: replacing a perfectly good actuator, clearing the code, and watching the EPC light return 20 miles later.
Disclaimer
The information contained in this repair guide is drawn from personal experience, independent research, and documented engineering principles. I am not a certified automotive technician, nor do I represent Volkswagen, IHI Corporation, or any affiliated entity. Vehicle repair carries inherent risks, including but not limited to severe burns, injury from heavy components, engine damage, electrical fires, and exhaust gas exposure. The procedures described above are based on repair work performed on a friend’s 2017 Volkswagen Golf Alltrack 1.8T (EA888 Gen 3, IS12 turbocharger, engine code CXBB). Always consult the official factory service manual for your vehicle’s VIN, adhere to all torque specifications, and use appropriate safety equipment—jack stands, wheel chocks, eye protection, nitrile gloves, and a Class B fire extinguisher. If you are not completely confident in your ability to perform these tasks safely and correctly, please entrust your vehicle to a qualified professional workshop with access to factory-level diagnostic tools. Neither Akotex nor the author assumes any liability for damage, injury, or financial loss resulting from the use or misuse of this information.
Recommended Internal Links for Akotex
To strengthen topical authority and improve user navigation, link this article to your related content, including:
Leave a Reply